
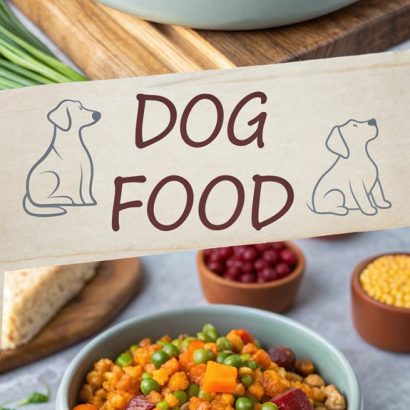
Canning Dog Food Recipes
You might be surprised to learn that homemade dog food can be safely preserved for up to a year using a proper canning method. This not only provides your pet with nutritious meals but also saves you time in the long run. By understanding the intricacies of canning, you can guarantee your dog enjoys a variety of flavors while benefiting from high-quality ingredients. So, what essential steps do you need to take to create these recipes, and how can you guarantee they’re both safe and delicious for your furry companion?
Why You’ll Love This Recipe
When it comes to feeding your furry friend, homemade canned dog food has some undeniable perks.
First, it offers superior nutritional quality with higher meat protein content and fewer carbs compared to kibble. Your dog will likely find it more palatable due to its moist texture and natural flavors, making mealtime more enjoyable. Additionally, canned food provides higher water content that can significantly aid in hydration.
Canned food is also a great option for dogs with dental issues since it’s easier to chew. Plus, the high moisture content helps keep your dog hydrated, especially if they face urinary or kidney problems.
Ultimately, making canned dog food is convenient; you can warm it up for added aroma and flavor, making it a win-win for both you and your pet.
History
The evolution of dog food reveals a fascinating journey shaped by necessity and innovation. In 1860, James Spratt created the first commercial dog biscuits, starting a trend that would grow over the decades.
By 1907, Milk-Bones entered the market, competing with Spratt’s Dog Cakes. After World War I, a surplus of horses led to the launch of canned dog food by Ken-L Ration in 1918. This product quickly gained popularity, particularly by 1922, thanks to its use of lean, red horse meat.
During World War II, metal rationing pushed companies to develop dry dog food as a practical alternative. By the 1950s, big names like General Mills and Ralston Purina expanded the dry food market, marking a significant shift in how we feed our pets today.
Recipe
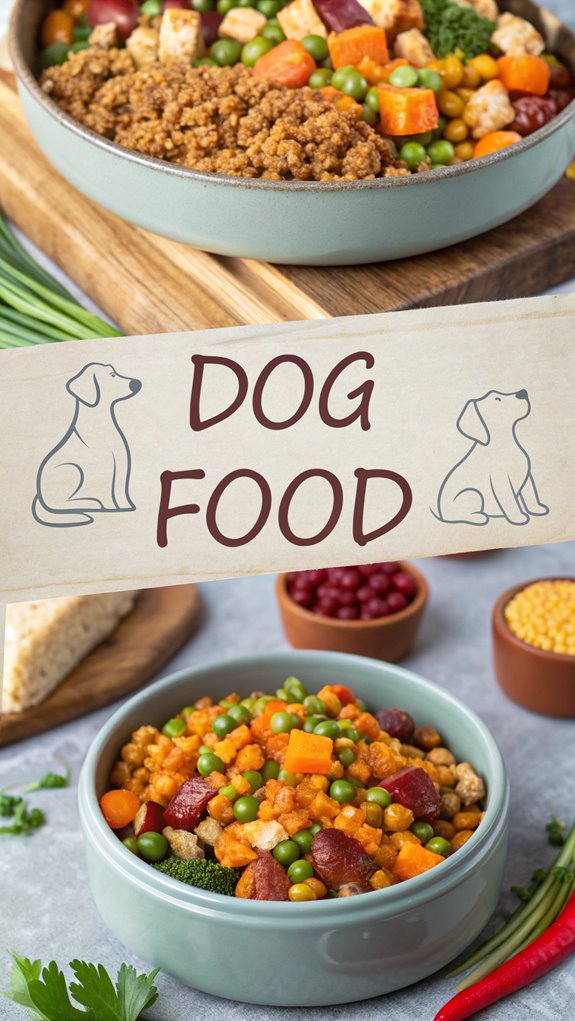
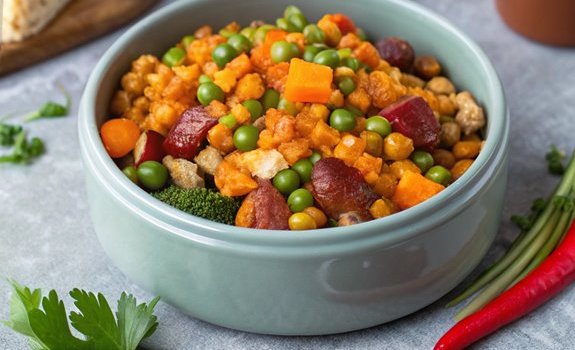
Creating homemade dog food can be a rewarding endeavor, guaranteeing your furry friend receives high-quality, nutritious meals tailored to their needs. This recipe incorporates a balanced mix of proteins, vegetables, and grains, providing essential nutrients for your dog’s health. By canning the dog food, you can prepare large batches and store them safely for later use. Additionally, homemade dog food can be shelf-stable and gluten-free, ensuring that you have nutritious options available for your pet.
Before you begin, make certain to gather all your ingredients and equipment. A pressure canner is crucial for safely preserving your dog food, while hot, sterile jars will prevent contamination. This recipe offers a nutritious blend that pets will love, and can be stored at room temperature for up to a year if properly canned.
Ingredients:
- 2 lbs ground turkey or beef
- 1 cup chopped carrots
- 1 cup chopped sweet potatoes
- 1 cup chopped celery
- 1 cup green beans
- 1 cup spinach
- 2 cups brown rice
- 2 tbsp coconut oil
- 1 tbsp flax seed
- 1 tbsp apple cider vinegar
- 2 hard-boiled eggs (including shells, finely crushed)
- 1 clove garlic (minced, optional)
Cooking Instructions:
- In a large skillet, brown the ground turkey or beef over medium heat until fully cooked. Drain any excess fat and set aside.
- In a large pot, bring water to a boil and add the chopped carrots, sweet potatoes, celery, and green beans. Boil until soft, approximately 10-15 minutes. Add the spinach just before draining to wilt it.
- In another pot, cook the brown rice according to package instructions, using extra water to guarantee it’s overcooked and prevents swelling. Once done, drain any excess water.
- In a large mixing bowl, combine the cooked meat, vegetables, cooked rice, coconut oil, flax seed, apple cider vinegar, crushed eggshells, and minced garlic. Mix thoroughly until all ingredients are well incorporated.
- Process the mixture in a food processor to achieve the desired consistency, whether chunky or smooth, depending on your dog’s preference.
- Fill hot, sterile jars with the mixture, leaving about an inch of headspace at the top. Wipe the rims of the jars with a clean cloth to guarantee a good seal.
- Place the jars in a pressure canner, ensuring they aren’t touching. Follow the manufacturer’s instructions for processing time and pressure settings specific to dog food.
- Once processed, allow the jars to cool at room temperature before checking the seals. Store sealed jars in a cool, dark place.
For ideal results, always monitor your dog’s individual dietary needs and preferences. Consult your veterinarian for any specific ingredient adjustments based on your dog’s breed, age, and health conditions.
Additionally, guarantee that all ingredients are fresh and safe for canine consumption, and consider adding dog-specific vitamins to enhance the nutritional value of the food. Happy cooking!
Final Thoughts
Canning dog food at home not only guarantees your furry friend enjoys nutritious meals but also gives you control over the ingredients. However, safety is key. Always follow low-acid canned food regulations to keep your dog safe from bacterial growth. Ascertain proper sterilization, and be mindful of BPA concerns with can liners. Canned food can last up to five years, but remember to refrigerate it after opening. Additionally, proper sterilization of jars ensures a safe canning process, preventing any potential health hazards for your pet.
Homemade canned food provides higher digestibility, lower carbs, and more animal protein, leading to healthier coats. You can customize recipes for your dog’s needs, making it both convenient and cost-effective. Just be careful with handling and processing to prevent contamination—your dog’s health depends on it!
FAQ
Got questions about canning dog food? You should know that pressure canning is crucial for making shelf-stable dog food. Hot water bath canning isn’t safe for this purpose. Always verify your canned food complies with the US regulations for safety.
Be cautious of BPA in can linings, as it can harm your dog’s health. After canning, store the food properly and use it within a few weeks. Opened cans should go in the fridge, preferably in glass containers. Canned foods typically maintain moisture content, which is essential for hydration.
When preparing your dog food, choose meaty ingredients and a balanced mix of vegetables. Remember to follow the suggested ratios and control fat content to prevent spoilage.
Finally, monitor your dog’s weight and adjust their food intake as needed.
CANNING DOG FOOD RECIPES
Ingredients
- INGREDIENTS:
- 2 lbs ground turkey or beef
- 1 cup chopped carrots
- 1 cup chopped sweet potatoes
- 1 cup chopped celery
- 1 cup green beans
- 1 cup spinach
- 2 cups brown rice
- 2 tbsp coconut oil
- 1 tbsp flax seed
- 1 tbsp apple cider vinegar
- 2 hard-boiled eggs including shells, finely crushed
- 1 clove garlic minced, optional
Instructions
- COOKING INSTRUCTIONS:
- In a large skillet, brown the ground turkey or beef over medium heat until fully cooked. Drain any excess fat and set aside.
- In a large pot, bring water to a boil and add the chopped carrots, sweet potatoes, celery, and green beans. Boil until soft, approximately 10-15 minutes. Add the spinach just before draining to wilt it.
- In another pot, cook the brown rice according to package instructions, using extra water to guarantee it's overcooked and prevents swelling. Once done, drain any excess water.
- In a large mixing bowl, combine the cooked meat, vegetables, cooked rice, coconut oil, flax seed, apple cider vinegar, crushed eggshells, and minced garlic. Mix thoroughly until all ingredients are well incorporated.
- Process the mixture in a food processor to achieve the desired consistency, whether chunky or smooth, depending on your dog's preference.
- Fill hot, sterile jars with the mixture, leaving about an inch of headspace at the top. Wipe the rims of the jars with a clean cloth to guarantee a good seal.
- Place the jars in a pressure canner, ensuring they aren't touching. Follow the manufacturer's instructions for processing time and pressure settings specific to dog food.
- Once processed, allow the jars to cool at room temperature before checking the seals. Store sealed jars in a cool, dark place.
- For ideal results, always monitor your dog's individual dietary needs and preferences. Consult your veterinarian for any specific ingredient adjustments based on your dog's breed, age, and health conditions.
- Additionally, guarantee that all ingredients are fresh and safe for canine consumption, and consider adding dog-specific vitamins to enhance the nutritional value of the food. Happy cooking!

