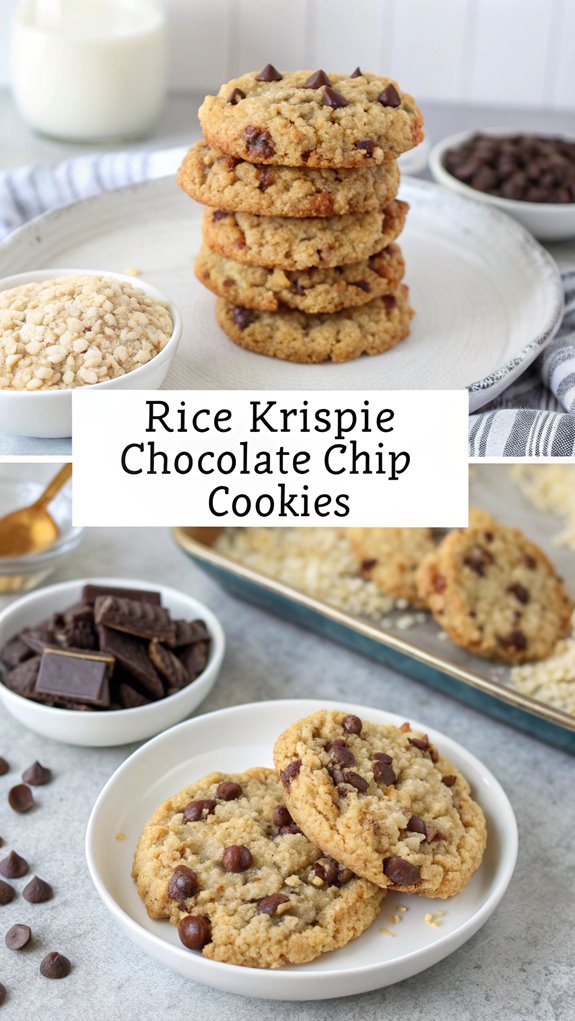
Rice Krispie Chocolate Chip Cookies
Imagine you’re at a potluck, and someone brings a batch of Rice Krispie chocolate chip cookies that instantly stand out among the usual desserts. You might wonder how such a simple combination of ingredients can create a treat that’s both nostalgic and innovative. These cookies not only capture the essence of classic chocolate chip cookies but also add a satisfying crunch that elevates the experience. What makes them so appealing, and how can you easily make them a staple in your own baking repertoire?
Why You’ll Love This Recipe
Baking these Rice Krispie chocolate chip cookies is sure to become a favorite in your kitchen. This recipe stands out because it’s quick and easy, requiring no chilling time, which means you can have delicious cookies in under 30 minutes.
You’ll love how simple the ingredients are; they’re straightforward and commonly found in your pantry. The unique texture of these cookies is another reason to try this recipe. The addition of Rice Krispies gives them a delightful crunch while keeping the cookie itself chewy. Additionally, each cookie contains approximately 163 calories, which allows you to enjoy a treat without too much guilt.
You’ll notice a beautiful golden brown color when they bake, and the slightly underset middle adds to their soft, chewy goodness. Customization is key with this recipe. You can easily switch up the chocolate chips with butterscotch, peanut butter, or even M&M candies.
If you’re looking for healthier options, consider using organic sprouted brown rice crisps or a gluten-free flour replacement. Plus, if you want to make more, doubling the batch is simple.
With quick baking times of just 8-10 minutes, these cookies aren’t only fun to make but also satisfying to eat, combining the best of Rice Krispie treats and chocolate chip cookies.
History
Exploring the history of Rice Krispies reveals a fascinating journey that began in 1927 with the development of the cereal by Kellogg. By 1928, Rice Krispies were introduced to the public, quickly becoming known as “The Talking Cereal” due to their unique sound when milk was added. This delightful noise comes from the cereal’s physical structure, which has pockets of air that shatter upon contact with liquid.
In 1939, Kellogg employees Mildred Day and Malitta Jensen experimented with Rice Krispies and marshmallows, leading to the creation of Rice Krispies Treats, originally named “Marshmallow Squares.” The first recipe for these treats appeared on a cereal box in 1941, marking a significant moment in their history. The idea likely drew inspiration from earlier recipes, such as puffed wheat and molasses treats.
During the 1930s, these treats gained popularity, especially through use by the Camp Fire Girls for fundraising. Over time, Rice Krispies Treats found their way into homes across America, leading to various adaptations and even records for the largest versions made, showcasing their enduring appeal. The innovations in puffed cereals by Quaker Oats during the early 1900s also contributed to the growing popularity of similar snacks.
These treats remain a beloved snack, enjoyed by many today.
Recipe
Rice Krispie Chocolate Chip Cookies
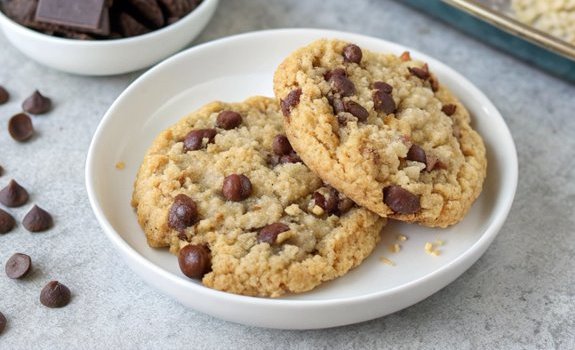
These Rice Krispie Chocolate Chip Cookies combine the classic flavors of chocolate chip cookies with the delightful crunch of Rice Krispies, creating a unique treat that everyone will love. The addition of Rice Krispies adds an unexpected texture that complements the soft, chewy cookie base, making each bite a delicious experience. These cookies are not only delicious but also easy to make, making them perfect for bakers of all skill levels.
Whether you’re baking for a special occasion or just to satisfy a sweet craving, these cookies are sure to impress. To make these cookies, you’ll need a few basic ingredients that are common in most cookie recipes. The process is straightforward, making it easy for both seasoned bakers and beginners alike. With just a few simple steps, you can whip up a batch of cookies that are perfect for sharing or enjoying yourself with a glass of milk.
Ingredients:
- ½ to 1 cup butter, softened to room temperature
- 1 cup brown sugar
- ½ to 1 cup granulated sugar
- 1 to 2 large eggs
- 1 to 2 cups all-purpose flour
- ½ teaspoon baking powder
- ½ teaspoon baking soda
- 1 to 2 cups Rice Krispie cereal
- 1 to 2 cups semi-sweet chocolate chips
- 1 cup shredded coconut (optional)
- Marshmallows (optional)
Directions:
- Preheat your oven to 350°F (or 375°F if specified in your recipe). Prepare a baking sheet by lining it with parchment paper or greasing it lightly.
- In a large mixing bowl, cream together the softened butter, brown sugar, and granulated sugar for 2-3 minutes until the mixture is well combined and fluffy.
- Add the eggs one at a time, mixing in between each addition, and incorporate a splash of vanilla extract if desired for added flavor.
- In a separate bowl, whisk together the all-purpose flour, baking powder, and baking soda. Gradually add the dry ingredients to the wet mixture, stirring until just combined.
- Gently fold in the Rice Krispie cereal and semi-sweet chocolate chips, taking care not to crush the cereal too much. If using, add shredded coconut and marshmallows at this stage.
- Using a cookie scoop or a tablespoon, drop 2-tablespoon sized scoops of dough onto the prepared baking sheet, spacing them about 2 inches apart.
- Bake the cookies in the preheated oven for 8-10 minutes or until the edges are lightly golden brown. Keep an eye on them to avoid over-baking.
- Once baked, allow the cookies to cool on the baking sheet for 2-3 minutes before transferring them to a wire rack to cool completely.
For best results, remember to measure your ingredients accurately, especially the flour, as too much can lead to dry cookies. If you want a gooey center, consider adding a few extra marshmallows in the dough or placing one on top before baking.
Additionally, feel free to experiment with other mix-ins like butterscotch chips or peanut butter chips for a customized cookie experience!
Final Thoughts
Rice Krispie chocolate chip cookies stand out as a delightful twist on a classic favorite. Their unique combination of crunchy Rice Krispies and chewy cookie dough creates a satisfying texture that appeals to everyone. You can easily customize the recipe by adding nuts, coconut, or using different types of chocolate to suit your taste.
One of the best aspects of these cookies is their simplicity. Many recipes are quick to prepare, making them perfect for bakers of all skill levels. Just remember, don’t overbake them if you want to keep that chewy center. Additionally, the recipe evolved over the years with added ingredients like nuts and dried fruit, allowing for even more variety.
This flexibility also allows you to adapt the recipe for gluten-free or vegan options, ensuring that everyone can enjoy them.
These cookies are versatile, suitable for casual snacks or more special occasions. The fun of experimenting with different ingredients makes baking them an exciting activity.
Plus, they’ve gained popularity for their innovative texture and delightful flavor. Ultimately, Rice Krispie chocolate chip cookies offer a practical and enjoyable baking experience, leaving you with a treat that’s sure to please family and friends alike.
Give them a try, and you’ll see why they’ve become a beloved dessert!
FAQ
If you’re curious about making Rice Krispie chocolate chip cookies or need a bit more guidance, you’ve come to the right place.
To start, preheat your oven to 350-375 degrees Fahrenheit. Line your baking sheets with parchment paper or silicone mats for easy clean-up.
When mixing your ingredients, cream the butter and sugars for 2-3 minutes using an electric mixer.
In a separate bowl, combine all-purpose flour, baking soda, baking powder, and salt. Once mixed, gradually add the dry ingredients to the wet mixture, mixing just until combined.
For the best flavor, always use real butter and whole eggs; egg substitutes haven’t been tested in this recipe. Additionally, incorporating Kelloggs® Rice Krispies® into the dough adds a delightful crunch to your cookies.
You can customize your cookies by swapping in different chips like butterscotch or peanut butter, or adding in marshmallows for a gooey center.
Bake your cookies for 8-10 minutes until the edges are lightly golden brown. After baking, let them cool on the sheet for 2-3 minutes before transferring them to a wire rack.
For the best experience, serve them slightly warm. Enjoy your delicious creations!
Rice Krispie Chocolate Chip Cookies
Ingredients
- Ingredients:
- ½ to 1 cup butter softened to room temperature
- 1 cup brown sugar
- ½ to 1 cup granulated sugar
- 1 to 2 large eggs
- 1 to 2 cups all-purpose flour
- ½ teaspoon baking powder
- ½ teaspoon baking soda
- 1 to 2 cups Rice Krispie cereal
- 1 to 2 cups semi-sweet chocolate chips
- 1 cup shredded coconut optional
- Marshmallows optional
Instructions
- Directions:
- Preheat your oven to 350°F (or 375°F if specified in your recipe). Prepare a baking sheet by lining it with parchment paper or greasing it lightly.
- In a large mixing bowl, cream together the softened butter, brown sugar, and granulated sugar for 2-3 minutes until the mixture is well combined and fluffy.
- Add the eggs one at a time, mixing in between each addition, and incorporate a splash of vanilla extract if desired for added flavor.
- In a separate bowl, whisk together the all-purpose flour, baking powder, and baking soda. Gradually add the dry ingredients to the wet mixture, stirring until just combined.
- Gently fold in the Rice Krispie cereal and semi-sweet chocolate chips, taking care not to crush the cereal too much. If using, add shredded coconut and marshmallows at this stage.
- Using a cookie scoop or a tablespoon, drop 2-tablespoon sized scoops of dough onto the prepared baking sheet, spacing them about 2 inches apart.
- Bake the cookies in the preheated oven for 8-10 minutes or until the edges are lightly golden brown. Keep an eye on them to avoid over-baking.
- Once baked, allow the cookies to cool on the baking sheet for 2-3 minutes before transferring them to a wire rack to cool completely.
- For best results, remember to measure your ingredients accurately, especially the flour, as too much can lead to dry cookies. If you want a gooey center, consider adding a few extra marshmallows in the dough or placing one on top before baking.
- Additionally, feel free to experiment with other mix-ins like butterscotch chips or peanut butter chips for a customized cookie experience!