
Peter Reinhart Bread Recipes
Like the alchemists of old, you might find that transforming simple ingredients into a loaf of bread is both an art and a science. Peter Reinhart’s approach invites you to experiment with unique techniques and diverse flours, but you may wonder how his methods stand apart from traditional baking practices. His emphasis on soakers and starters not only enriches flavor but also enhances nutrition. As you consider the nuances of his recipes, you’ll likely start to question which elements could elevate your own baking experience. What’s the secret to achieving that perfect crust?
Why You’ll Love This Recipe
One reason you’ll love Peter Reinhart’s bread recipes is their innovative use of ingredients that elevate homemade bread to new heights. He incorporates sprouted flours, whole and ancient grains, and alternative flours like teff, which enhance flavor and nutrition. Reinhart also teaches extensive techniques, such as soakers, bigas, and sourdough starters, which develop rich flavors in your bread. If you have dietary restrictions, you’ll appreciate his health-friendly options, including gluten-free recipes. The cutting-edge methods he shares are designed for versatility, allowing you to scale recipes for different occasions. By exploring the potential of grains through sprouting and fermentation, you’ll discover how to create delicious, unique loaves that impress your family and friends. Additionally, Reinhart emphasizes a scientific approach to baking, which deepens your understanding of the processes involved in creating perfect bread.
History
Although Peter Reinhart’s journey into the world of baking began nearly 40 years ago, it was a mix of challenges and discoveries that truly shaped his approach to bread-making.
You might find it interesting that he started experimenting with recipes by following Julia Child’s precise instructions. While his results varied, this experience taught him essential bread-making principles.
Running Brother Juniper’s, a small bakery in California, further deepened his love for fresh-baked bread. As a full-time chef at Johnson & Wales University, he was able to share his passion and knowledge with aspiring culinary students.
As he shifted to teaching at culinary schools and consulting for food companies, Reinhart’s impact grew.
His cookbooks, including the award-winning The Bread Baker’s Apprentice, highlight his innovative techniques, making him a respected authority in the world of bread and baking.
Recipe
Peter Reinhart Bread Recipe
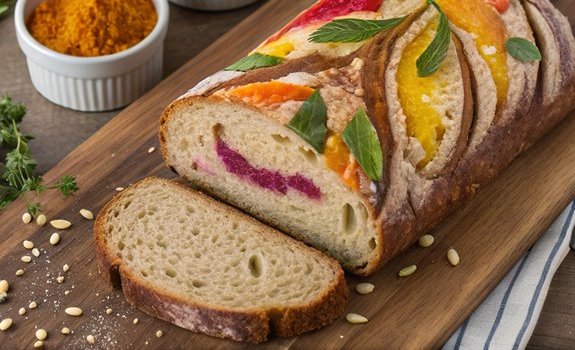
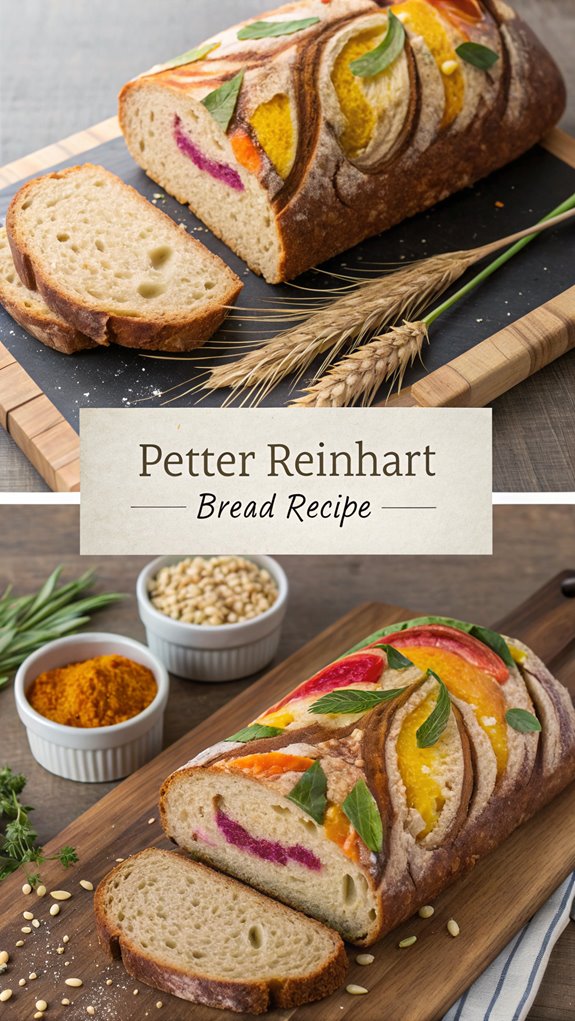
Making a delicious loaf of bread at home can be a rewarding experience, and Peter Reinhart’s recipe provides a solid foundation for creating artisan-style bread with a crisp crust and chewy interior. This recipe uses simple, high-quality ingredients and emphasizes the importance of technique, allowing bakers of all skill levels to achieve success. The recipe yields 2 large loaves of bread, making it perfect for sharing or enjoying throughout the week.
Whether you’re a seasoned baker or just starting, following these steps will yield a loaf that’s bound to impress. The process involves mixing, kneading, and shaping the dough, allowing for a series of stretches and folds to develop the gluten structure, which is essential for a good rise.
The final shaping can be tailored to create various bread forms such as boules, baguettes, or sandwich loaves. With just a few ingredients and some patience, you can enjoy the warm, comforting aroma of freshly baked bread right from your own oven.
Ingredients:
– 5 1/3 cups (24oz / 680g) unbleached bread flour
– 2 teaspoons (0.5oz / 14g) salt, or 1 tablespoon coarse kosher salt
– 2 teaspoons (0.22oz / 6g) instant yeast
– 2 1/4 cups (18oz / 510g) lukewarm water (about 95F or 35C)
– Optional: soaker ingredients like cornmeal, oats, or wheat bran for added flavor and texture
Instructions:
- In a large mixing bowl, combine the bread flour, salt, and instant yeast. Mix well to guarantee that the salt and yeast are evenly distributed throughout the flour.
- Gradually add the lukewarm water to the dry ingredients, mixing with a wooden spoon or your hands until a shaggy dough forms. Confirm that all the flour is incorporated.
- Once the dough is mixed, transfer it to a lightly floured surface and begin kneading. Knead for about 10 minutes, until the dough becomes smooth and elastic.
- After kneading, place the dough in a lightly greased bowl, cover it with plastic wrap or a damp cloth, and let it rise in a warm place until it has doubled in size (approximately 1 to 2 hours).
- Once the dough has risen, gently deflate it and perform a series of stretch and folds. Grab one edge of the dough, stretch it up, and fold it over itself. Rotate the dough 90 degrees and repeat the process at least 4 times, allowing 10-minute intervals between each fold.
- After completing the stretch and fold process, pre-shape the dough into a round or oval shape, depending on your desired final loaf shape. Let it rest for 20-30 minutes.
- For final shaping, shape the dough into your preferred loaf style (boule, baguette, etc.). Place the shaped dough onto a floured proofing basket or baking sheet, cover it, and let it rise again until it has puffed up (about 1 hour).
- Preheat your oven to 450°F (232°C). If using a baking stone, place it in the oven to heat up as well.
- Just before baking, score the top of the dough with a sharp knife or razor blade to allow steam to escape.
- Bake the bread in the preheated oven, misting the oven with water to create steam, for about 25-35 minutes until the crust is golden brown and the loaf sounds hollow when tapped on the bottom.
- Remove the bread from the oven and let it cool on a wire rack before slicing.
Extra Tips:
For the best results, use a kitchen scale to measure your ingredients accurately. This will guarantee consistency in your baking.
Experiment with different soaker ingredients or optional seeds to customize the flavor and texture of your bread. Additionally, keep an eye on the dough during the rise times; factors like temperature and humidity can influence how quickly the dough rises, so adjust your timing accordingly.
Enjoy the process and don’t be afraid to make mistakes—each loaf is a learning experience!
Final Thoughts
Baking bread using Peter Reinhart’s recipe can be both a satisfying and educational experience. To succeed, focus on mastering techniques like proper mixing and kneading, as these develop gluten for a great texture.
Try the stretch and fold method for a nicely shaped loaf, and use the windowpane test to check your dough’s stretchiness. Scoring your bread before baking lets steam escape and enhances the crumb. Remember, proofing your dough in a warm space helps it rise evenly, while using a banneton basket can improve its shape. Always preheat your oven to the right temperature for ideal baking, and cool your bread on a wire rack to develop a perfect crust. Additionally, be mindful of your yeast activity, as proper fermentation is essential for achieving the desired rise in your bread.
Enjoy the process and don’t hesitate to experiment!
FAQ
What questions do you have about bread making?
To start, remember that time, temperature, and ingredients are essential. Each element affects your bread’s outcome. For optimal flavor, using the right quality ingredients is crucial, as it significantly impacts the final taste and texture of your bread.
For better gluten development, use high-gluten or bread flour. If your dough feels too dry, it’s okay to begin with a wetter mixture; it can absorb more flour later.
When handling the dough, pre-shaping tightens the gluten, and resting helps it relax. Don’t forget to score your loaf before baking!
For rising, create a warm proofing environment, and use the stretch and fold method for strength.
Finally, the windowpane test is a great way to check if your dough is ready.
Happy baking!

PETER REINHART BREAD RECIPES
Ingredients
- Ingredients:
- - 5 1/3 cups 24oz / 680g unbleached bread flour
- - 2 teaspoons 0.5oz / 14g salt, or 1 tablespoon coarse kosher salt
- - 2 teaspoons 0.22oz / 6g instant yeast
- - 2 1/4 cups 18oz / 510g lukewarm water (about 95F or 35C)
- - Optional: soaker ingredients like cornmeal oats, or wheat bran for added flavor and texture
Instructions
- Instructions:
- In a large mixing bowl, combine the bread flour, salt, and instant yeast. Mix well to guarantee that the salt and yeast are evenly distributed throughout the flour.
- Gradually add the lukewarm water to the dry ingredients, mixing with a wooden spoon or your hands until a shaggy dough forms. Confirm that all the flour is incorporated.
- Once the dough is mixed, transfer it to a lightly floured surface and begin kneading. Knead for about 10 minutes, until the dough becomes smooth and elastic.
- After kneading, place the dough in a lightly greased bowl, cover it with plastic wrap or a damp cloth, and let it rise in a warm place until it has doubled in size (approximately 1 to 2 hours).
- Once the dough has risen, gently deflate it and perform a series of stretch and folds. Grab one edge of the dough, stretch it up, and fold it over itself. Rotate the dough 90 degrees and repeat the process at least 4 times, allowing 10-minute intervals between each fold.
- After completing the stretch and fold process, pre-shape the dough into a round or oval shape, depending on your desired final loaf shape. Let it rest for 20-30 minutes.
- For final shaping, shape the dough into your preferred loaf style (boule, baguette, etc.). Place the shaped dough onto a floured proofing basket or baking sheet, cover it, and let it rise again until it has puffed up (about 1 hour).
- Preheat your oven to 450°F (232°C). If using a baking stone, place it in the oven to heat up as well.
- Just before baking, score the top of the dough with a sharp knife or razor blade to allow steam to escape.
- Bake the bread in the preheated oven, misting the oven with water to create steam, for about 25-35 minutes until the crust is golden brown and the loaf sounds hollow when tapped on the bottom.
- Remove the bread from the oven and let it cool on a wire rack before slicing.