
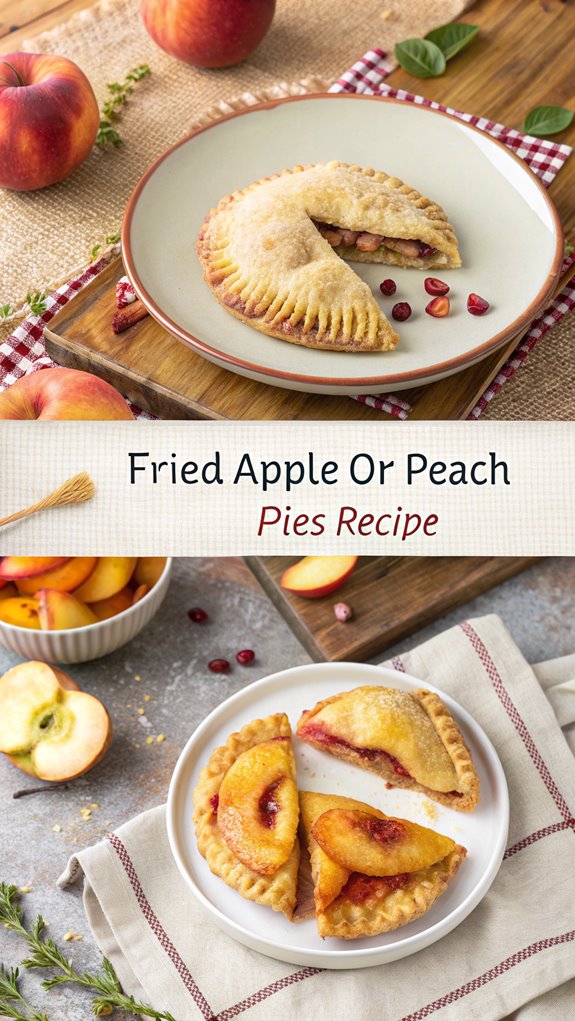
Fried Apple or Peach Pies 2
Did you know that fried apple and peach pies have roots tracing back to the Cornish pasty? These delicious treats were created for workers seeking a portable dessert in rural Arkansas. With a flaky crust and a sweet, spiced filling, they’ve become a favorite for many. If you’re curious about how to make these delightful pies and the history behind them, keep going to uncover the recipe and tips for perfecting your frying technique.
Why You’ll Love This Recipe
When you make fried apple or peach pies, you’ll discover a delightful combination of flavors and textures that everyone will love. This recipe is easy to prepare, using simple ingredients like Granny Smith and Gala apples, along with cinnamon and nutmeg for extra flavor. The filling cooks down in just 10-15 minutes, ensuring a quick treat. You’ll enjoy a soft, flaky crust that becomes crunchy when fried. Plus, you can choose to fry, flash fry, or bake, depending on your preference. For added sweetness, consider a glaze to enhance the flavor. These pies can be served warm, especially with a scoop of vanilla ice cream, making them a versatile dessert to impress your friends and family. Additionally, the dough may start out sticky, but adjusting the flour will help you achieve the perfect texture.
History
Fried pies have a rich history that reflects both cultural traditions and practical needs. Their origins trace back to the Cornish pasty, brought to America by British miners. In rural Arkansas, female home cooks embraced fried pies, making them a convenient and affordable dessert. During the industrial era, these portable treats became popular among workers needing easy-to-carry meals. This tradition of Scottish meat pies designed for portability influenced the development of fried pies in the South. Regional variations emerged, showcasing local fruits like apples and peaches. The invention of canned biscuit dough in the 1930s simplified the pie-making process. In 1968, McDonald’s introduced its fried apple pie, peaking in popularity during the 1980s. Though the chain shifted to baked pies in 1992, the 2018 revival celebrated this beloved treat’s enduring legacy.
Recipe
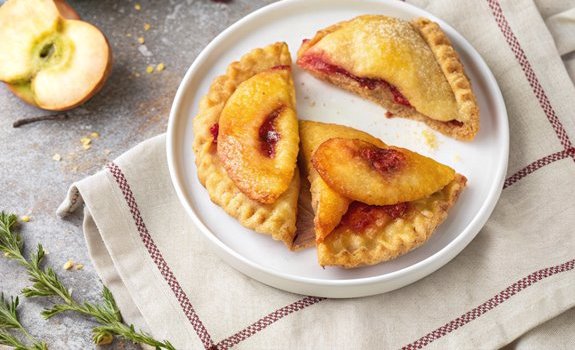
Fried apple or peach pies are a delightful treat that capture the essence of homemade comfort food. With a flaky, golden crust and a sweet, spiced fruit filling, these pies are perfect for any occasion, whether it’s a family gathering or a simple indulgence on a cozy evening. The combination of apples or peaches with warm spices like cinnamon creates a mouthwatering filling that will have everyone reaching for seconds. Making these pies from scratch is simpler than you might think. The process begins with preparing the fruit filling, which is then encased in either puff pastry or a homemade pie crust. Once assembled, the pies are chilled and then fried to perfection, resulting in a crispy exterior that contrasts beautifully with the sweet, tender fruit inside. It’s worth noting that most countries still have fried apple pies, while the US has shifted to baked versions in response to health perceptions. Get ready to impress your friends and family with this delicious dessert!
Ingredients:
– 2 large apples, peeled and diced
– 45g Brown sugar (¼ cup)
– ¼ tsp Ground cinnamon
– 1 tsp Cornstarch
– Neutral Oil, for frying
– Puff pastry or pie crust
Cooking Instructions:
- Begin by peeling and dicing the apples into small pieces. In a saucepan, combine the diced apples, brown sugar, ground cinnamon, and a bit of butter (if desired) over medium heat until the butter melts and the mixture is well combined.
- Reduce the heat, cover the saucepan, and allow the apples to cook for about 15 minutes or until they become softened. Stir occasionally to prevent sticking.
- Once the apples are soft, uncover the saucepan and add the cornstarch. Stir constantly until the mixture thickens. Remove from heat and let the apple filling cool before placing it in the refrigerator to chill.
- While the filling cools, prepare your puff pastry or pie crust. Roll it out and cut it into rectangles or circles, depending on your desired shape for the pies.
- Pipe or place a line of the chilled apple filling down the center of each piece of dough. Top with another piece of dough, pressing down the edges to seal them well. You can use a fork to crimp the edges for an added decorative touch.
- Chill the assembled pies in the freezer for 1 hour to help them hold their shape during frying.
- In a deep skillet or frying pan, heat neutral oil over medium-high heat. Once hot, carefully add the pies to the oil, frying them until they’re golden brown on both sides. Use a slotted spoon to remove them from the oil and drain on a wire rack.
Extra Tips:
When preparing your fried pies, verify that the oil is hot enough before adding the pies; otherwise, they may absorb too much oil and become greasy. You can test the oil temperature by dropping a small piece of dough in; if it sizzles immediately, the oil is ready.
Also, feel free to experiment with the filling by adding other spices like nutmeg or vanilla for a unique flavor twist, or mix in some raisins or nuts for added texture.
Final Thoughts
After enjoying your homemade fried apple or peach pies, it’s important to think about how to store them and the best practices for maximizing their flavor and texture.
Ideally, you should eat the pies on the same day. If you need to store them, let the pies cool completely before wrapping each one in plastic wrap and placing them in an airtight container. Homemade versions of these pies offer a nostalgic taste that is hard to replicate with store-bought options.
You can keep them at room temperature or refrigerate for 1-2 days. For the best results, use high-quality ingredients like homemade crust, fresh peaches, and real.
FAQ
What should you know about making and enjoying fried peach pies? First, use fresh or canned freestone peaches for the filling. Combine them with sugar, lemon juice, cornstarch, and vanilla. It’s recommended to use canned peaches for convenience and peak flavor.
For the dough, mix flour, shortening, evaporated milk, and salt. If you prefer, blanch and peel the peaches for easier skin removal.
When cooking, heat peanut oil to 325-350°F for frying, and cook the pies for about 45 seconds per side until golden brown. You can bake them at 400°F for 15-30 minutes.
For storage, freeze un-fried pies in an airtight container for up to 3 months. Remember to defrost them for 24 hours before frying. Enjoy your delicious homemade treats!

FRIED APPLE OR PEACH PIES 2
Ingredients
- Ingredients:
- - 2 large apples peeled and diced
- - 45g Brown sugar ¼ cup
- - ¼ tsp Ground cinnamon
- - 1 tsp Cornstarch
- - Neutral Oil for frying
- - Puff pastry or pie crust
Instructions
- Cooking Instructions:
- Begin by peeling and dicing the apples into small pieces. In a saucepan, combine the diced apples, brown sugar, ground cinnamon, and a bit of butter (if desired) over medium heat until the butter melts and the mixture is well combined.
- Reduce the heat, cover the saucepan, and allow the apples to cook for about 15 minutes or until they become softened. Stir occasionally to prevent sticking.
- Once the apples are soft, uncover the saucepan and add the cornstarch. Stir constantly until the mixture thickens. Remove from heat and let the apple filling cool before placing it in the refrigerator to chill.
- While the filling cools, prepare your puff pastry or pie crust. Roll it out and cut it into rectangles or circles, depending on your desired shape for the pies.
- Pipe or place a line of the chilled apple filling down the center of each piece of dough. Top with another piece of dough, pressing down the edges to seal them well. You can use a fork to crimp the edges for an added decorative touch.
- Chill the assembled pies in the freezer for 1 hour to help them hold their shape during frying.
- In a deep skillet or frying pan, heat neutral oil over medium-high heat. Once hot, carefully add the pies to the oil, frying them until they're golden brown on both sides. Use a slotted spoon to remove them from the oil and drain on a wire rack.