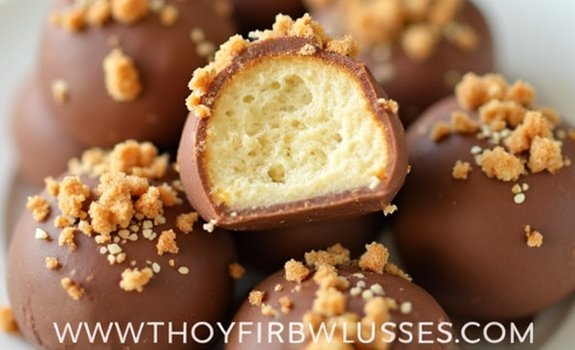
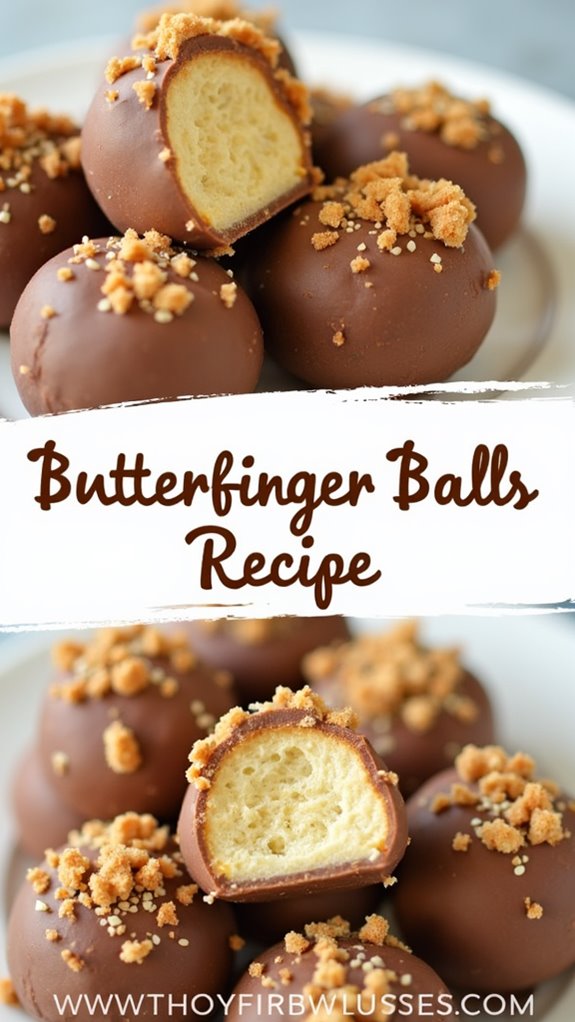
Butterfinger Balls
Butterfinger Balls are a simple and tasty no-bake dessert that you can whip up in no time. With just a few ingredients, like peanut butter and crushed Butterfinger bars, you can create a treat that’s perfect for any occasion. They require minimal prep and chilling time, making them a great option for warm days. If you want to learn how to make these delicious bites and discover some fun variations, keep going.
Why You’ll Love This Recipe
If you’re a candy lover, you’re going to love this recipe for Butterfinger balls! These tasty treats combine creamy peanut butter, graham cracker crumbs, crushed Butterfinger bars, and melted chocolate, creating a delicious flavor. You’ll appreciate how quick and easy the preparation is, taking just 15 minutes, plus a 30-minute chilling time. Since these are no-bake, they’re perfect for hot days or when you want to skip the oven.
Additionally, they have received high ratings of 4.96 from festival attendees, showcasing their popularity. You can also customize them with extra crushed Butterfingers, holiday sprinkles, or coarse salt for added flair. These bite-sized desserts are ideal for parties, making them a great addition to any gathering. Plus, they’re simple enough to prepare in advance, saving you time when hosting!
History
Butterfinger balls not only delight your taste buds, but they also have a rich history that dates back to the early 20th century.
Invented in 1923 by Otto Schnering, the owner of the Curtiss Candy Company near Chicago, the name “Butterfinger” was chosen through a public contest. Its name came from the phrase used for baseball players who dropped balls.
The brand gained popularity with innovative marketing, like dropping Butterfingers from airplanes with parachutes. In 1934, Shirley Temple endorsed the candy, giving it a celebrity boost. One of the earliest examples of celebrity candy endorsements, Temple’s charm and innocence helped enhance Butterfinger’s attractiveness to family audiences.
During WWII, Butterfingers were included in soldiers’ rations due to their energy content.
Over the years, ownership changed hands several times, with Nestlé acquiring it in 1990, and recently, Ferrero took over in 2018.
Recipe
Ingredients:
– 1 cup creamy peanut butter
– 4 tablespoons unsalted butter
– 1 cup powdered sugar
– ½ cup crushed Butterfinger candy bars
– 8 ounces chocolate bark (or chocolate chips)
Instructions:
- In a large mixing bowl, use a stand mixer with the paddle attachment to combine the creamy peanut butter and softened unsalted butter until the mixture is smooth and well-blended.
- Gradually add in the powdered sugar and continue mixing until the mixture is fully incorporated and has a dough-like consistency. Powdered sugar is key to sweetening and structuring the candies.
- Fold in the crushed Butterfinger candy bars with a rubber spatula until evenly distributed.
- Scoop out 1-tablespoon-sized portions of the mixture and roll them into smooth balls. Place the balls on a baking sheet lined with parchment paper.
- Chill the balls in the refrigerator for 30 minutes to firm them up.
- While the balls are chilling, melt the chocolate bark (or chocolate chips) in a microwave-safe bowl. Heat in 30-second bursts, stirring in between, until completely melted and smooth.
- Once the balls have chilled, dip each one into the melted chocolate using a fork or toothpick, ensuring they’re fully coated.
- Tap off any excess chocolate and place them back on the parchment-lined baking sheet.
- Sprinkle extra crushed Butterfingers on top of the chocolate coating for garnish before the chocolate sets.
- Refrigerate the dipped balls for at least 1 hour to allow the chocolate coating to harden completely.
For best results, store your Butterfinger balls in an airtight container in the fridge.
They’ll stay fresh for up to a week, although they may not last that long!
If you prefer a little extra crunch, consider adding some chopped nuts or using crunchy peanut butter in the mix.
Enjoy your homemade treats!
Final Thoughts
When you whip up these delicious Butterfinger balls, you’re not just creating a tasty treat; you’re also bringing a delightful mix of flavors and textures that everyone will love.
These sweet bites are perfect for parties or gatherings, combining chocolate, peanut butter, and Butterfinger to create a rich experience. Keyword research is essential for optimizing your recipe blog, ensuring your delicious creations reach a wider audience.
With a caloric content of about 202-219 kcal per serving, enjoy them in moderation.
Store your Butterfinger balls in an airtight container to keep them fresh for up to five days in the fridge or two months in the freezer.
Remember, serving them chilled enhances the taste.
Whether you stick to the classic recipe or try lighter variations, these treats will surely satisfy your sweet tooth!
FAQ
If you’ve got questions about making Butterfinger balls, you’re in the right place.
You can use different types of chocolate, like dark or white chocolate, for coating your treats. Just remember, all-natural peanut butter isn’t recommended because it doesn’t mix well. Additionally, Butterfinger Balls can be stored in an airtight container for up to a month in the fridge, making them a convenient treat to have on hand.
If you want to customize your Butterfinger balls, feel free to add flavor extracts or other crushed candy bars. They’ll last a few days in an airtight container, so you can enjoy them for a while.
To make the process easier, chill your peanut butter mixture first, and use a dipping tool to coat the balls more neatly.
Finally, let them set on parchment or wax paper for easy cleanup. Enjoy your delicious creations!

BUTTERFINGER BALLS
Ingredients
- Ingredients:
- - 1 cup creamy peanut butter
- - 4 tablespoons unsalted butter
- - 1 cup powdered sugar
- - ½ cup crushed Butterfinger candy bars
- - 8 ounces chocolate bark or chocolate chips
Instructions
- Instructions:
- In a large mixing bowl, use a stand mixer with the paddle attachment to combine the creamy peanut butter and softened unsalted butter until the mixture is smooth and well-blended.
- Gradually add in the powdered sugar and continue mixing until the mixture is fully incorporated and has a dough-like consistency. Powdered sugar is key to sweetening and structuring the candies.
- Fold in the crushed Butterfinger candy bars with a rubber spatula until evenly distributed.
- Scoop out 1-tablespoon-sized portions of the mixture and roll them into smooth balls. Place the balls on a baking sheet lined with parchment paper.
- Chill the balls in the refrigerator for 30 minutes to firm them up.
- While the balls are chilling, melt the chocolate bark (or chocolate chips) in a microwave-safe bowl. Heat in 30-second bursts, stirring in between, until completely melted and smooth.
- Once the balls have chilled, dip each one into the melted chocolate using a fork or toothpick, ensuring they're fully coated.
- Tap off any excess chocolate and place them back on the parchment-lined baking sheet.
- Sprinkle extra crushed Butterfingers on top of the chocolate coating for garnish before the chocolate sets.
- Refrigerate the dipped balls for at least 1 hour to allow the chocolate coating to harden completely.
- For best results, store your Butterfinger balls in an airtight container in the fridge.
- They'll stay fresh for up to a week, although they may not last that long!
- If you prefer a little extra crunch, consider adding some chopped nuts or using crunchy peanut butter in the mix.
- Enjoy your homemade treats!